
Lacquer Peel and Clearcoat Repair in Doncaster
Clearcoat is the layer that does the protecting, and it is also the layer that fails first. Once it starts lifting at an edge or clouding across a roof, it only gets worse. We strip it back properly and refinish the panel rather than papering over a failure that is already spreading.
Clearcoat Does Not Fail Evenly, and Patching It Does Not Work
Lacquer peel usually starts as a small edge lift on a roof, bonnet or boot lid, the panels that take the most UV and the most heat cycling. Left alone it spreads outward as moisture gets under the lifted edge and pushes further delamination from beneath. By the time it is visible from three feet away, the bond between clear and colour has usually already failed over a wider area than what you can see.
A common request is to feather in just the peeling patch and clear over the top. We will tell you honestly when that is not going to hold. If the clear has failed because the bond itself has broken down, new clear laid over an unstable edge lifts again within a season, and the repair looks worse the second time than the first.
The proper fix is to strip the affected panel back to sound material, establish where the failure actually stops rather than where it happens to be visible, and rebuild the finish from there. That is more work than a touch-up, and it is the only version of this job that lasts.
The Jobs That Actually Come In As Clearcoat Failure
Not every dull or hazy panel is lacquer peel, and telling the difference at the quote stage saves you paying for a full strip when a machine polish would have done it.
- Clear lifting at a panel edge, seam or badge surround
- Roof, bonnet and boot lid clouding from UV breakdown over several years
- Cracking or crazing in the clear, often called crow's foot cracking
- Clear that has delaminated after a poor quality respray elsewhere
- Sun damage on a vehicle that has stood outside for long periods
- Heat damage around exhaust heat shields or after an engine bay fire risk area
How Far Back We Go, Panel by Panel
The right depth of repair depends on how far the failure has actually spread underneath the surface, not just what is visible standing next to the car. We check with a fingernail at the lifted edge and with light raked across the panel before deciding where the strip line goes.
Exact flatting grades, primer builds and clear coat counts follow the product data sheet for the system in use on the day.
| Failure type | How far we go | Rebuild | What the customer notices afterwards |
|---|---|---|---|
| Localised edge lift, panel edge or badge surround | Stripped back to a clean edge well beyond the visible lift, checked with a fingernail for any further give. | Primer filler where needed, sealer, then colour blended out and full clear over the repaired area. | A clean edge with no ridge you can feel running a hand across it. |
| Roof or bonnet UV clouding, clear intact but dull | Assessed for machine polishing first. If the clear still has film thickness left, this is not a strip job. | Cut and polish in stages, with a check for clear left over any low spots before committing. | A revived gloss without the cost of a strip and respray, provided the clear had life left in it. |
| Crow's foot cracking across a panel | Stripped fully, since cracking this fine means the clear has failed through its depth, not just at the surface. | Primer, colour and a fresh full clear coat to the panel's natural break line. | One consistent finish rather than cracks showing through new clear laid over the old. |
| Delamination after a previous poor respray | Stripped back past the old repair entirely, including checking what is under it for filler or primer that was never properly keyed. | Correct preparation from bare material up, using our own Lechler colour rather than trusting the old match. | A repair that does not repeat the same failure a second time. |
| Heat affected clear near an exhaust or engine bay edge | Assessed for how far the heat has travelled through the film before any sanding starts. | Localised strip and rebuild if the damage is contained, full panel if the heat has spread the failure. | A finish that matches the surrounding panel rather than a visible patch. |
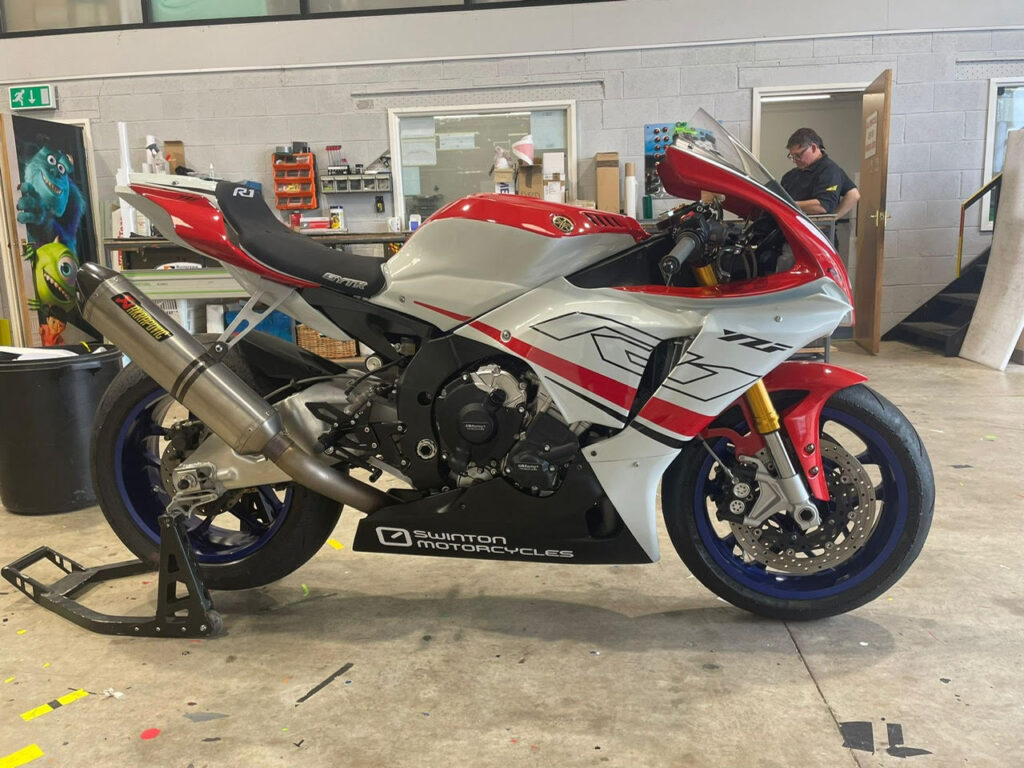
| Motorbike tank and fairing clear failure | Stripped with care around decals and graphics that may need reproducing rather than saving. | Colour and clear rebuilt to match the panel set, since bike bodywork is usually judged as a group of parts. | Panels that read as one finish when the bike is back together. |
How a Clearcoat Repair Actually Runs
The steps below are what separates a repair that lasts from a respray of a problem that comes back.
Establish the real extent of the failure
We check with a fingernail at every lifted edge and rake light across the panel, because the failure underneath is almost always bigger than what catches your eye in normal light.
Decide whether this needs a strip or a polish
If the clear still has usable film thickness and the problem is dullness rather than delamination, we will say so and offer the cheaper option rather than selling a full strip unnecessarily.
Mask off everything not being touched
Trim, glass, badges and adjoining panels are protected before any sanding starts, so dust and overspray stay confined to the repair area.
Strip back to sound material
Failed clear and any unstable colour beneath it is removed back to a point past where the fingernail test stopped catching, not just to the edge of what is visible.
Prime and build
Primer or primer filler goes down to seal the stripped area and level any low spots left by the failure, then flatted before colour.
Match and lay the colour
Colour is mixed on our Lechler scheme and blended out to a natural break line so the repair does not sit as a visible patch against original paint.
Apply the clear coat
Full clear goes over the repaired area to the break line, in controlled coats, so film build is even and there is no risk of a second early failure at a fresh edge.
Cure, flat and polish
Once cured, the clear is machine polished to bring up the gloss and blend the new finish into the surrounding original paint.
Final check in daylight
The panel is checked outside the booth, at an angle, for exactly the kind of edge lift that started the job in the first place.
We Tell You Which Option Actually Fixes It
A cheap patch over failing clear is not a saving if it lifts again next summer. We would rather quote the job that lasts, and explain why, than sell you the job that comes back.
What We Can Save, and What Needs a Full Respray
Clearcoat failure is one of the areas where the honest answer at the quote stage saves you money later, one way or the other.
Well suited to a targeted repair
- Localised edge lift on one panel, caught before it has spread far
- UV clouding where the clear still has usable film thickness left
- Delamination confined to a single panel or a clearly bounded area
- Motorbike tank and fairing clear failure where decals can be matched or reproduced
- Heat affected clear where the damage has not travelled through the whole panel
Where we will recommend a fuller respray
- Failure across multiple panels, where strip lines would leave visible joins
- Clear that has failed because of a poor quality respray with no proper primer underneath
- Any panel where rust has started under the lifted clear. Our paintwork warranty does not extend to rust unless the panel is replaced or welded
- Very old, thin factory clear where flatting for a targeted repair would risk cutting through what is left
- A colour promise made over the phone rather than checked against the panel in daylight
Lacquer Peel Questions
Why is my clearcoat lifting at the edges?
Panel edges take the most UV and heat cycling, so the bond between clear and colour tends to break down there first. Once moisture gets under a lifted edge it spreads the failure further underneath, which is why edge lift rarely stays small if left alone.
Can you just clear over the peeling patch?
Sometimes, but not when the bond has already failed. New clear laid over an unstable edge lifts again, usually within a season, and the second repair looks worse than the first. We will tell you honestly which category your panel is in.
Is my roof clouding lacquer peel or something else?
Dullness with the clear still intact is often UV breakdown that responds to machine polishing rather than a strip and respray. We check film thickness before deciding, because polishing through what little clear is left makes the problem worse, not better.
How do you know how far the failure has actually spread?
We check with a fingernail at every lifted edge and rake light across the panel. The affected area underneath is almost always larger than what is visible in normal light, which is why we go past the visible edge before rebuilding.
Will the repaired panel match the rest of the car?
We mix our own paint on site using our Lechler scheme and blend the colour out to a natural break line, so the repair reads as one finish with the surrounding original paint rather than a visible patch.
Can lacquer peel on a motorbike tank be repaired without losing the decals?
Sometimes the decals can be masked and saved, and sometimes they need reproducing as part of the job. We assess this before stripping so you know which situation applies before any work starts.
What causes crow's foot cracking in clearcoat?
Fine cracking across a panel usually means the clear has failed through its depth rather than just at the surface, often from age, heat cycling or a poor quality product. This needs a full strip rather than a spot repair, because new clear over cracked film cracks again.
Is there rust under my peeling clear?
Sometimes, particularly if the failure has been left for a long time and moisture has been getting to bare metal underneath. We check for this during the strip. Our paintwork warranty does not extend to rust unless the panel is replaced or welded.
How long does a clearcoat repair take?
It depends on how many panels are affected and whether the job is a targeted strip or a fuller respray. Bring the vehicle to our Doncaster workshop and we will give you an accurate timescale once we have seen the actual extent of the failure.
Is there a warranty on the repaired clearcoat?
We give a 6 year warranty on all paintwork, as well as a lifetime warranty on any plastic welding we perform. We cannot give warranty against rust unless the panel is replaced or welded.
Can you fix lacquer peel caused by another garage's respray?
Yes. We strip back past the previous repair and check what is underneath, since a common cause is colour or filler that was never properly keyed before the old clear went on.
Do you deal with insurance claims for clearcoat damage?
Yes, we handle insurance approved repairs and can deal with the insurance side of a claim where the damage qualifies. Bring the paperwork along with the vehicle and we will talk you through it.
Related Finishing Work
Bring the Panel Before It Spreads Further
The earlier a clearcoat failure is caught, the smaller the repair. Bring the vehicle to the workshop at Balby Carr Bank and we will check how far it has actually spread and give you an honest, accurate quote for the right fix.
We look after customers across Doncaster, Mexborough, Rotherham, Barnsley, Worksop and the wider South Yorkshire area.